


Shanghai Yongda elevator operating panel 16 button use method - Database & Sql Blog Articles
2021-04-19
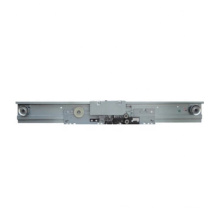
V/F elevator operating panel (Ammumciator)
II.1 V/F elevator directly installs MTC on the main circuit board INV-MPU, which can perform data observation, data value formulation, fault detection, elevator control adjustment and many other tasks.
II.2 The operation panel has the following functions:
a. Display the elevator condition (example: position, running direction, etc.)
b. Develop various data to adjust and test the elevator
c. Various elevator procedures, such as slow running in the machine room, floor height measurement, etc.
d. Inspection and measurement of various data generated in the elevator (especially the fault generation number)
II.3 For the arrangement of the operation panel, there are six seven-row tubes arranged in a row below the operation panel as a display. There are also a decimal point in the lower right corner of the seven-cut tube. These decimal points are used for other purposes in the V/F elevator.
The following paragraphs will be explained in further detail.
II.4 Normal display:
If the leftmost one of the seven cut pipes is numbered 1, and then the lying side is sequentially programmed as 2, 3, 4, 5, 6, then the No. 7 pipe is used to display the elevator running direction, and the second and third No. 7 cutting pipes are used. Show the floor where the elevator is located, set the elevator on the 23rd floor, the 7th 7th cut tube shows that the computer is not normal, and VTCD indicates that the secondary computer is not normal, showing the wild intermittent mode, each lasting 1.5 seconds; 5th, 6th, 7th The cutting tube displays the 'fault code'. The fault code is grouped in eight groups and is assigned as follows: 10~17, 20~27, 30~37, 40~47, 50~57, 60~67, 70~ 77, 80~87, explain in detail later. In the event of a fault, it is only necessary to know from the fault table the type of fault according to the values shown. The display situation is as shown in the figure. Assuming that the value is 62, it is known from the fault code that the synchronization position is abnormal.
II.5 Method of operation:
First, according to our needs, choose an appropriate number of modes, the number of modes starts from 0 to 69, but many of them are vacant, such as 8, 17, 25, 33, 44, 49, 58, 69. According to Figure 1, first press the 'Mode' button, then enter the number of modes according to actual needs (for example, the number of modes is 3, press the '3' button), and then press the 'Place' button. Display response: When the 'Mode' button is pressed, the original normal display disappears immediately. When the mode number is pressed, the mode number appears in the square and then shifts to the left. Since the mode number is only a two-digit number, the response It is displayed by two (7) and (6) seven cut tubes, but this only tells the user whether there is a wrong error when inputting the number of modes. If the user finds that the number of displays is the same as the number of the hit mode, press 'Place 'Key, so that the computer enters this mode, the mode number will disappear automatically, and the display will follow the mode to slap the corresponding instructions. When all operations are completed, the computer must be left in mode to return to normal control. Therefore, the user must press the 'mode' button again. If all the previous displays disappear immediately, follow the user's 'reset' button to make the computer leave the mode, and the normal display will resume immediately. (For the role of the different modes, see the pattern table below).
II.6 Examples of different mode numbers
1. Mode number 3 This mode is for low speed operation in the equipment room. According to the above, first perform the following procedures: press 'Mode', '3', 'Place' keys, and then raise or drop according to the requirements (such as Press '7' to increase the elevator speed; if you press '4' again, the elevator will drop at a low speed. If it is finished, you must return to normal operation. You can perform the following procedures (press 'Mode', '3', 'Reset'. ).
2. Manually measure the floor height. The number of modes is 11. Return the car to the lowest level after normal operation. Press 'Mode', '3', 'Reset' each button; press 'Start' button Until the elevator starts, let go. Carefully uncover the DIP switch cover on the INV-FIO board. Pay attention to whether the elevator continues to rise at a steady low speed (such as rising to a certain height, the elevator suddenly stops automatically, indicating that the measurement is unsuccessful). If the elevator balance rises to the highest level, the 50B relay will be automatically released. At this time, the DIP switch should be immediately turned off. The first position (the leftmost, push up, you can quickly re-enter the wind to 50B, then you can push the first position of the DIP switch and cover the cover. At this point, the floor height measurement has been To complete, you can perform the following procedures to return to normal operation: press 'Mode', '1', '1', 'Reset' each button.
3. Elevator running time display, here use the mode number 1 as before, press 'mode', '1', 'put in' each button. At this point, the display shows the actual running time of the elevator, in hours, and is a commonly used decimal number, while the decimal points on the display remain off.
4. The mechanical control of the door of the equipment room stops here. Actually, the mode is not required. Press the 'door action stop' button. At this time, the door action stop light (that is, the decimal point in the lower right corner of the 6th cutting tube) should be lit. Control, press the 'Reset' button to return to normal.
5. Before the mode number 2, press the 'Mode', '2', 'Place' keys, the display will be divided into three parts, and the two left seven cut tubes (ie 1 and 2) form a two-digit position. The number is displayed, and the number is hexadecimal, which means that the calculator ($0~74), the third and fourth two cut tubes show the fault data of ZTCD (main computer), and the fifth and sixth two cuts The tube displays the fault data of the VTCD (subcomputer). These display data are extensive in content, and if there is sufficient information, it can be used to understand the various errors or abnormalities of the elevator in the past based on such data. At the moment we only need to know how to eliminate this data (note: they do not indicate a fault, but represent a fault record made by the computer at the time of the computer's error, or a slight and self-disappearing fault). The method is as follows: first look at the first and second two cut tubes. If $74 is displayed, it means that each calculator has no fault or error record. At this time, press 'Reset' to restore the normal display, and keep it on time. Let go until the display is normal. If there is a fault record, the display will not change. For example, if the No. 2 device is not 00, the above two cut pipes will keep displaying $02. To continue watching other calculator contents, press the 'Increment/Decrement' button. If you do not press the 'Transfer' button, it will be incremented. If you press the 'Transfer' button and then press the 'Increment/Decrement' button, the effect will be decremented. In this observation, you don't have to use the 'Transfer' button unless you need to check back. If each calculator has a record (that is, the content is not 00), it will only increment by one at a time, but if there are several calculators in succession, there is no fault or error record. Press the 'increase/decrement' button to skip multiple calculations at a time. Device. If you continue, you can read and write down the contents of all $74 calculators. At this time, it is the same as the previous one. Press the 'Reset' button to restore the political display. The fault decimal point should not be repeated. bright. It should be noted here that due to the large number of calculators, all clearing takes a certain amount of time (within five seconds), so you must keep pressing the 'Reset' button for about five seconds to clear and return to normal display.
6. Reading data in the computer
In this case, there are two modes, 22 and 23, of which 22 is the main computer and 23 is the secondary computer. Take the main computer as an example, press 'Mode', 2, 2, 'Place' each button, the display should have no display at this time, if you want to read the data of a certain address (main computer), you can enter it at this time. For example, 1234 (address, hexadecimal): Press 1, 2, 3, 4, 'Place' keys, when the display starts.
The addresses are displayed one by one, but when the user finds the correct and presses the 'Place' button, the display changes to the data in the address. The 'Address/Data' button is also a conversion button. For example, when the data is displayed, you want to display the corresponding address again. You only need to press the 'Address/Data' button to display the address again. If the button is pressed continuously, the address and corresponding data will be displayed in turn, which is very convenient. To read the data of the previous address, just perform the following procedure when displaying the data: press 'Increment/Decrement' to achieve the purpose. To read the data of a lower address, use the 'Transfer' key, the program As follows: (display is displaying the address) Press 'Transfer', 'Increment/Decrement', you can know the data contained in the lower address. After the 'Transfer' button is pressed, the decimal point of the rightmost seven-pipe will be illuminated, indicating that the transfer key is effective. If you return to Figure 1, when you press the eight keys 0~7, the input is actually the number or letter in parentheses. , ie 8, 9, A~F, etc., not 0~7. It is not so convenient to use, and if you forget to press the 'Transfer' button, you will get an error. To cancel the 'transfer' effect, just press the 'Transfer' button again and the rightmost decimal point will also be extinguished at the same time.
7. On-site adjustment example
Although there are quite a few modes, there are not many used in the construction site. Generally, the load adjustment should be used, and this is taken as an example. At speeds of 90,105 m/min or more, one or two (two-time series) differential transformers for load detection are usually installed under the car. The output of this load detector directly reflects the output. The load inside the car.
1) Zero adjustment and bias adjustment:
The input voltage check and position (referring to the telescopic core) of the differential transformer are the same as those of the conventional old elevator or DC elevator, and will not be repeated here.
a. Keep the car unloaded
b. Flat layer (select the middle layer), press the STOP switch in the car to release the relay 50B
c. Push the leftmost one of the DIP switches on the FIO board.
d. Press the following keys from the operation panel: 'Mode', '3', '4', 'Place' (data display should be 00) [In this case, if you know the address, you can also use the following method MODE 23 SET 8034 SET]
e. Push the DIP switch down, the STOP switch returns to normal, and the 50B action.
f. If there is no pre-rush or retrograde phenomenon at start-up (rising or falling), the adjustment has been completed, but in general, the above two situations are likely to occur, and the following steps can be performed at this time.
2) Rise:
A) Repeat the above a, b, c items
B) Press the following keys: 'Mode', '5', '1', 'Place' to display the rising bias, the data should be in the range of $0000~$4000
C) If there is a pre-rush phenomenon when the elevator starts, the data can be increased, and the data is reduced correspondingly when retrograde
D) For example, if the original data is $2080 and you want to change to $1234, you can press the following keys: '1', '2', '3', '4', 'Place' (the original data $2080 has been replaced) .
E) Repeat the e item. If all is satisfactory, the adjustment is completed. Otherwise, it should be adjusted to the satisfaction according to the situation.
3) Decline
This situation is basically the same as the rise. The only difference is that the mode 52 is used instead of the mode 51. In addition, since the rise and fall are basically the opposite in nature, in the above item C), the data should be reduced before the punch, and the retrograde is increased. data.
4) Eddy load adjustment
a. Make the car load 100%
b. Flat layer (select the middle layer), press the STOP switch in the car to release the relay 50B
c. Push the leftmost one of the DIP switches on the FIO board.
d. Press the following keys from the operation panel: 'Mode', '3', '5', 'Place' will display the data should be $0064 or very close ($0064 is the decimal 100). If you follow mode 23, you should press The following keys: 'Mode', '2', '3', 'Place', '5', '0', '1', 'Transfer', '8', 'Transfer', 'Place'.
e. If the data is correct, it can be restored to normal, and the enemy will be tested. If there is obvious vibration during starting, the following items must be carried out.
5) Gain adjustment during vortex loading:
a. Press the following keys: 'Mode', '5', '5', 'Place' display data at this time (between $0000 and 00FF, generally D0) is the gain, if there is a rise before the rise, That is to reduce the data, the retrograde will increase the data, and the decrease will be: increase before the impulse and decrease the retrograde.
b. Repeat the adjustment until the vortex, and everything is restored.
OTIS Elevator Complete Control System, Thyssen Elevator Complete Control System, KONE Elevator Complete Control System, GiantKONE Elevator Complete Control System, ThyssenKrupp Elevator Complete Control System, Schindler Elevator Complete Control System, XJ Schindler Elevator Complete Control System, Xizi OTIS Elevator Complete Control System, Mitsubishi Elevator Complete Control System, Shanghai Mitsubishi Elevator Complete Control System, Fujitec Elevator Complete Control System, Hitachi Elevator Complete Control System, Toshiba Elevator Complete Control System, Hyundai Elevator Complete Control System, LG Elevator Complete Control System, Sigma Elevator Complete Control System, Express Elevator Complete Control System, GUANGRI Elevator Complete Control System, FUJI Elevator Complete Control System, BLT Elevator Complete Control System, CANNY Elevator Complete Control System, SJEC Elevator Complete Control System, KOYO Elevator Complete Control System, IFE Elevator Complete Control System
Elevator Control System, Elevator Controller Cabinet, Elevator Control Cabinet, Elevator Controller, Elevator Complete Controller, Elevator Complete Control System, Elevator Control Panel
Shanghai Mengtenali Drive Equipment Co.,Ltd http://www.zjelevatordoorsystem.com